SSO and LDAP
Under Administration > Settings > Extensions > SSO and LDAP, you configure LDAP authentication and Single Sign-On (SSO) for calServer. The plugin supports Microsoft Active Directory, OpenLDAP, and SAML-based SSO via Azure AD (Entra ID).
LDAP Configuration
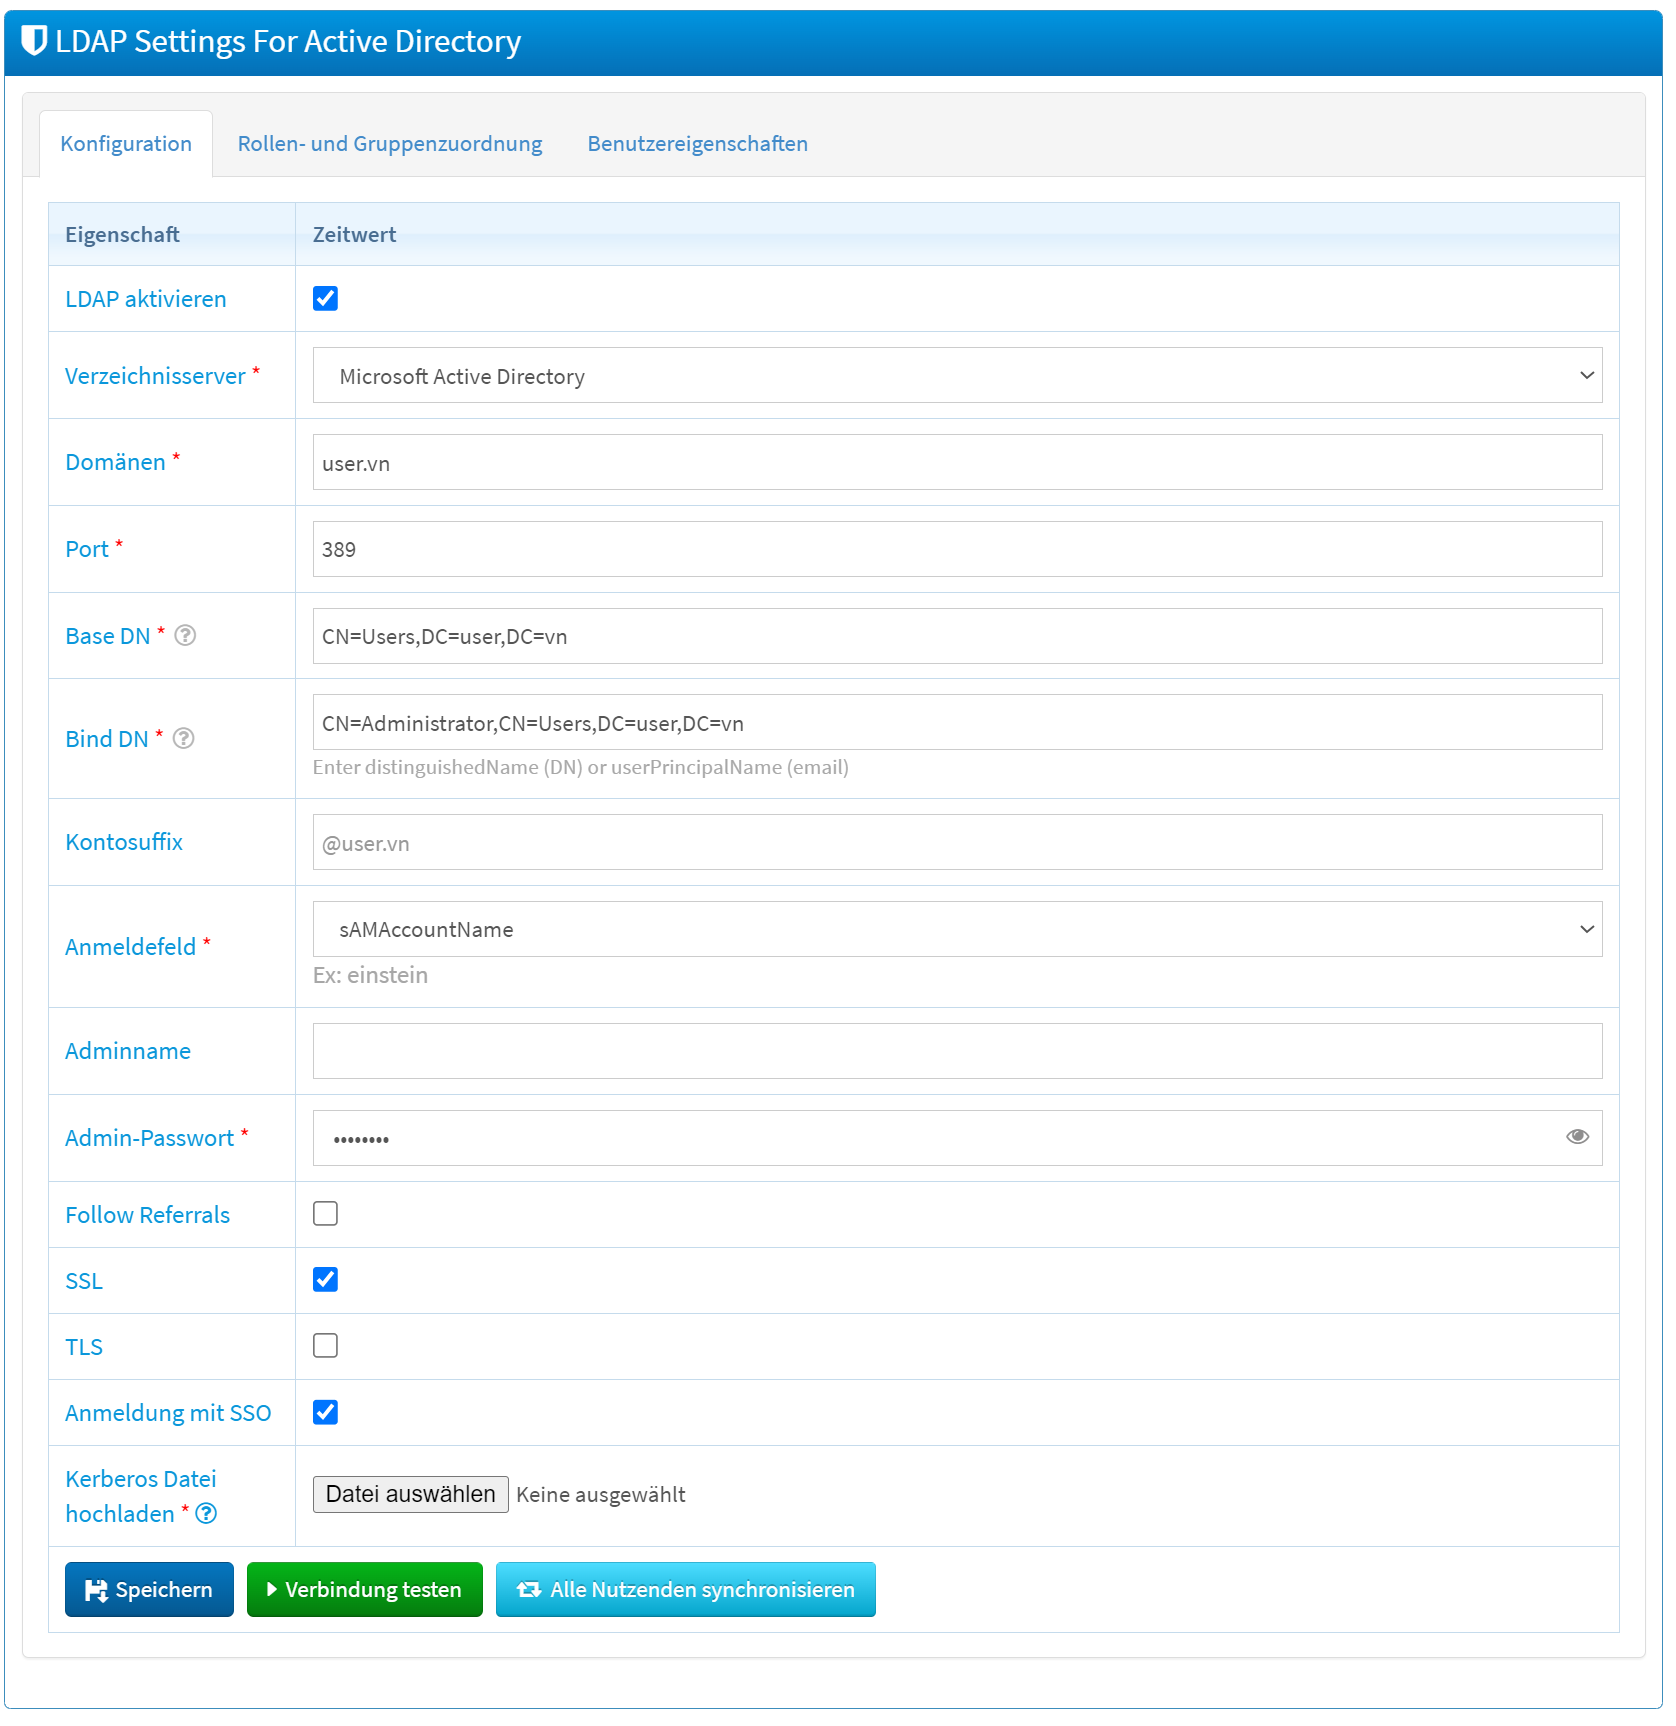
Connection Settings
| Field | Description |
|---|---|
| Enable LDAP | Activates or deactivates the LDAP integration. |
| Directory Server | Selection of the directory service: Microsoft Active Directory or OpenLDAP. |
| Domains | Domain(s) of the LDAP server (e.g., ldap.example.com). |
| Port | Port of the LDAP server (default: 389 unencrypted, 636 for SSL). |
| Base DN | Starting point in the LDAP directory tree for user and group searches. |
| Bind DN | User with which calServer authenticates to the LDAP server. |
| Account Suffix | Suffix for usernames during login (e.g., @ldap.example.com). |
| Login Field | LDAP attribute for the username (e.g., uid or sAMAccountName). |
| Admin Username | Administration account for LDAP management. |
| Admin Password | Associated password. |
Security Options
| Field | Description |
|---|---|
| Follow Referrals | Enables following referrals to other LDAP servers. |
| SSL | Encrypted communication via SSL. |
| TLS | Encrypted communication via TLS (STARTTLS). |
SSO Options
| Field | Description |
|---|---|
| Login with SSO | Activates Single Sign-On for automatic login. |
| Upload krb5 file | Upload of the Kerberos configuration file (krb5.conf) for SSO. |
Actions
| Action | Description |
|---|---|
| Save | Applies the LDAP configuration. |
| Test Connection | Tests the reachability of the LDAP server. |
| Sync all users | Synchronizes all users between LDAP and calServer. |
Set Up SAML SSO with Azure AD
The following configuration steps are required to set up SAML-based SSO with Microsoft Azure AD (Entra ID).
Register Application in Azure AD
- Sign in to the Azure Portal.
- Navigate to Entra Admin Center > Enterprise Applications > New Application.
- Select Create your own application.
- Assign a name (e.g., "calServer SSO") and select Integrate any other application not found in the gallery.
Configure SAML in Azure AD
- Open the created application under Enterprise Applications.
- Navigate to Set up SSO > Get started > SAML.
- Enter the SAML URLs:
- Identifier (Entity ID):
https://<your-domain>/auth/saml/metadata - Reply URL:
https://<your-domain>/auth/saml/login - Sign-on URL (optional):
https://<your-domain>/auth/saml/sso
- Identifier (Entity ID):
- Save the settings.
Customize Attributes and Claims
Add the following custom claims under Attributes & Claims:
| Claim | Source Attribute |
|---|---|
| company | user.companyname |
user.mail |
|
| lastname | user.surname |
| firstname | user.givenname |
| phone | user.mobilephone |
Configure LDAP Mapping in calServer
Sign in as an administrator in calServer and configure the attribute mapping under LDAP Settings:
| calServer Field | SAML Attribute |
|---|---|
| First Name | firstname |
| Last Name | lastname |
email |
|
| Phone | phone |
| Company | firm |
Assign Users and Groups
- Open the application in Azure AD.
- Navigate to Users and groups.
- Assign the desired users or groups.
Warning
Group claims in the SAML response require a Microsoft Entra ID P1 or P2 license. The Free and Basic editions do not support group claims.
Direct SSO login (deep link)
When Entra ID is enabled, the URL
starts the Entra SSO login immediately and skips the login form. This is the exact same target as the Sign in with Entra ID button on the login page. The deep link works well as a bookmark or shortcut for signing in directly via SSO.
After a logout the regular login form is shown again (no automatic SSO redirect).
Notes
- Test the LDAP connection after each configuration change via the Test Connection button.
- If there are problems with SSO login, check the Azure logs and the calServer configuration.
- Groups in calServer can be used to manage customer accounts. Users in a group automatically receive access to the associated customers.