User Profile
The user profile in calServer allows you to manage personal data, security settings, and API access. The following sections describe all functions and areas of the profile management.
Profile Details
Here, basic user information can be entered or changed.
Fields:
- First Name / Last Name -- The full name of the user
- Password / Confirm Password -- Option to change the password
- Email -- The registered email address
- Phone -- The stored phone number
- Company -- Associated organization or company
Note
Required fields are marked with a red asterisk (*).
Profile Picture
- Option to upload a profile picture
- Images can be uploaded via drag and drop or using the "Browse Files" button
- The current image can be removed using the delete function
Signature
- Here, a digital signature can be saved or changed
- The signature can be created directly using mouse or touch input
- The signature can be reset using "Clear"
Certificates
- Certificate Info: A certificate description can be stored here
- Self-Signed Certificate: Option to upload your own certificate
- Signature Details: Additional information about the electronic signature
After making changes to the profile information, you must press the Save button at the bottom to apply the changes.
Contact Details
Here, additional contact information can be stored.
Input Fields:
- Identifier / Department -- Identification within the company
- Name -- Name of the contact
- Street, Postal Code, City -- Address of the contact
Functions:
- Reset Filters -- Clears set filters
- Customize Columns -- Adjustment of visible columns
- Add Contact -- Adds a new contact
- Actions Menu -- Management of individual contacts
- Delete Selected -- Removes selected contacts from the list
Mailer Actions
In this area, you can enable or disable automatic email notifications.
Note
The options displayed here depend on the individual settings in the email management.
Functions:
- Enable/disable automatic email notifications -- Each option represents an automated email that can be sent through the system.
- Different content depending on the notification -- Some emails contain notifications about system events, while others provide reports or lists (e.g., as CSV or Excel attachments).
All changes must be applied using the Save button.
Start Settings
Here, the default values for the user view can be configured.
Settings:
- Default Page Size -- Number of displayed entries per page
- Status Start Filter -- Sets the default filter for the inventory status (e.g., "All", "Active Only", "Deleted", "Deactivated")
- Customer Start Filter -- Determines which customer account is displayed by default in the inventory grid
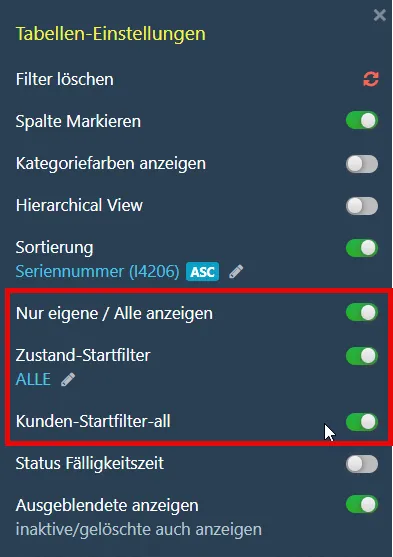
| No. | Setting | Description |
|---|---|---|
| ① | Default Page Size | Number of displayed entries per page in the grid. |
| ② | Status Start Filter | Default filter for the inventory status (e.g., "All", "Active Only", "Deleted"). |
| ③ | Customer Start Filter | Determines which customer account is displayed by default in the inventory grid. |
Note
If an account has multiple customers assigned, the entry selected here is set as the default filter for the grid. Likewise, the status filter can be configured to display only certain device types (e.g., active or deactivated devices).
Optionally, email notifications for the support module can be enabled.
Changes must be saved to take effect.
Generate API Key
Here, an individual API key for using the REST API can be created.
Functions:
- Show API Key -- Displays the already generated API key
- Generate Button -- Creates a new API key
- Save Button -- Saves the new API key
Important
An API key is used for authentication in API requests. It should not be shared.
Table Settings
Via the table settings in the user profile, you can customize the display of grids. Detailed information about configuring table filters can be found under The Grid.
Help and Support
Via the Help and Support area in the user profile, you can access the integrated documentation and the ticket system.